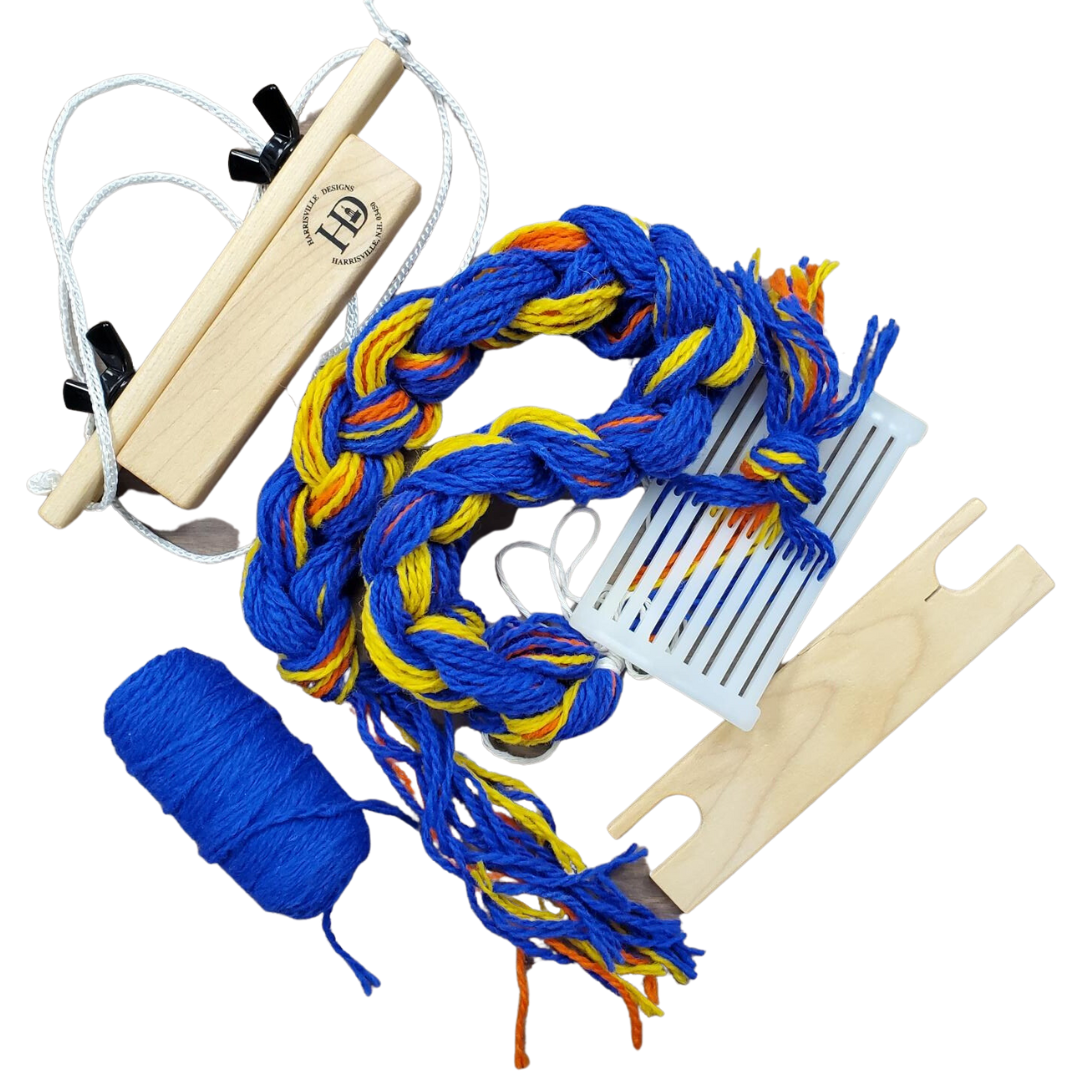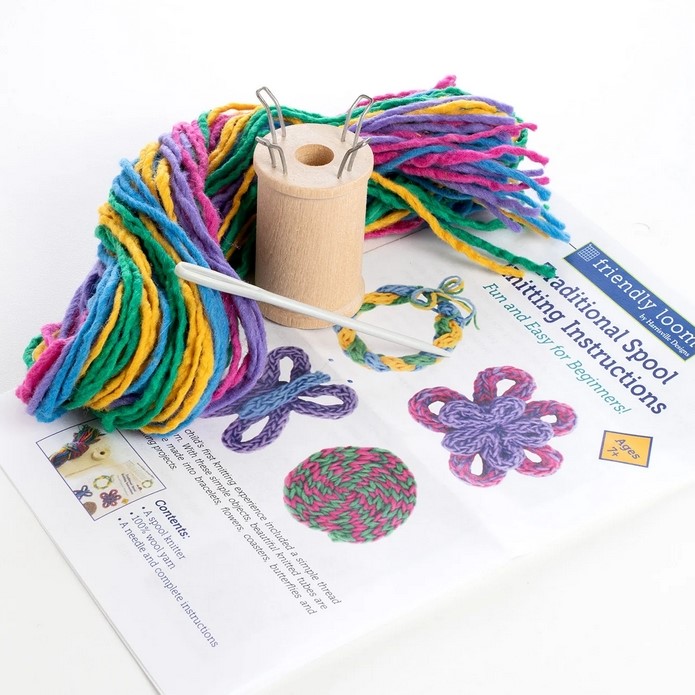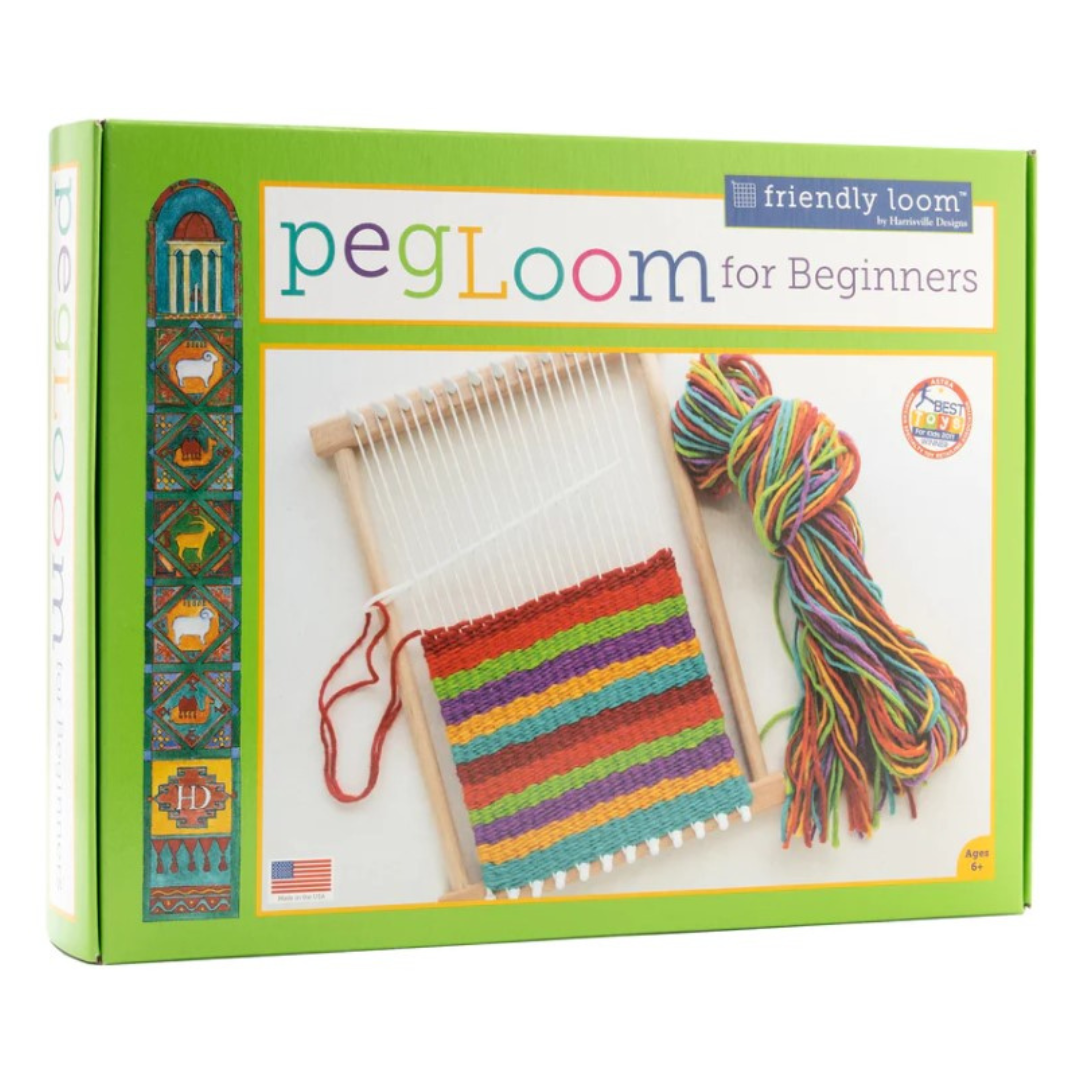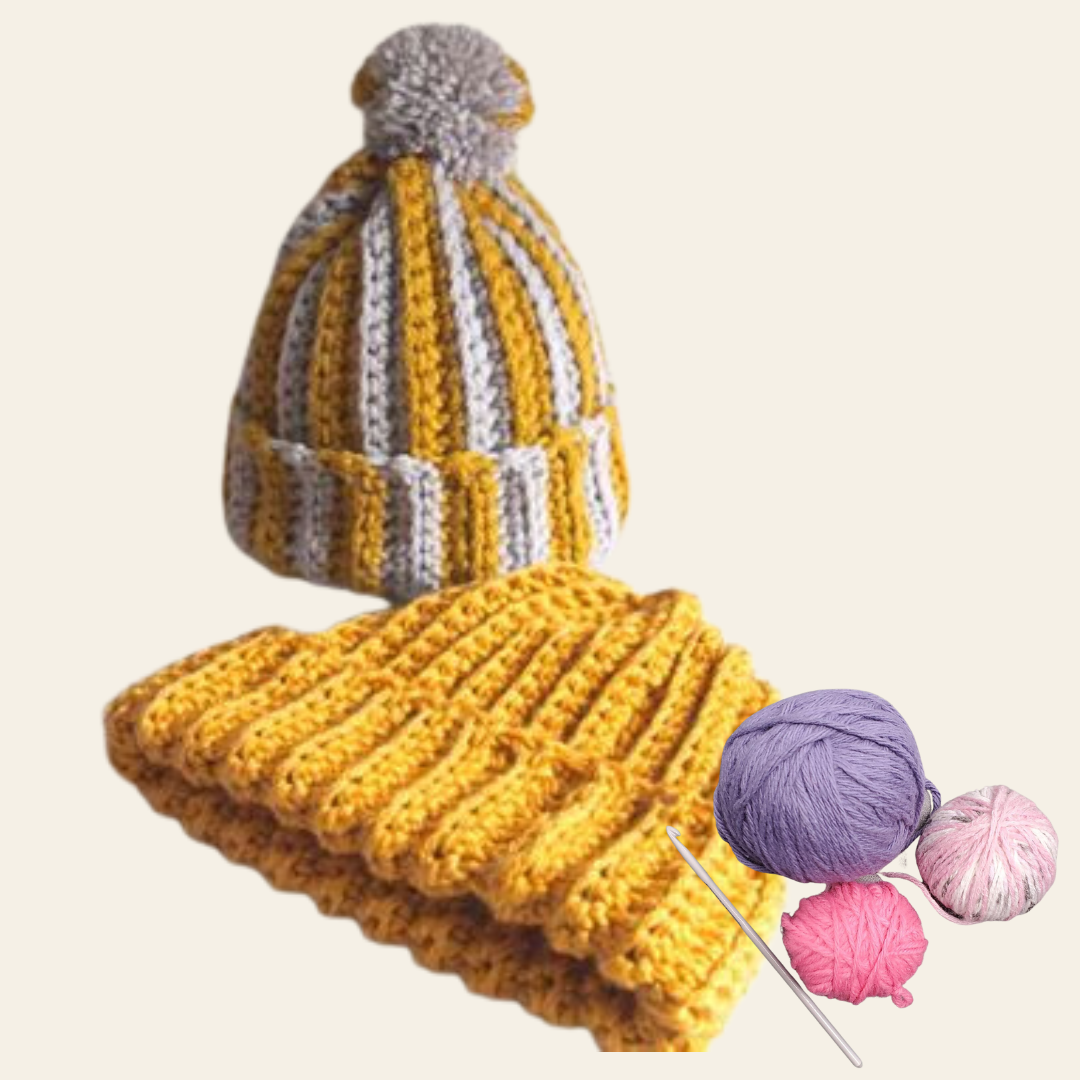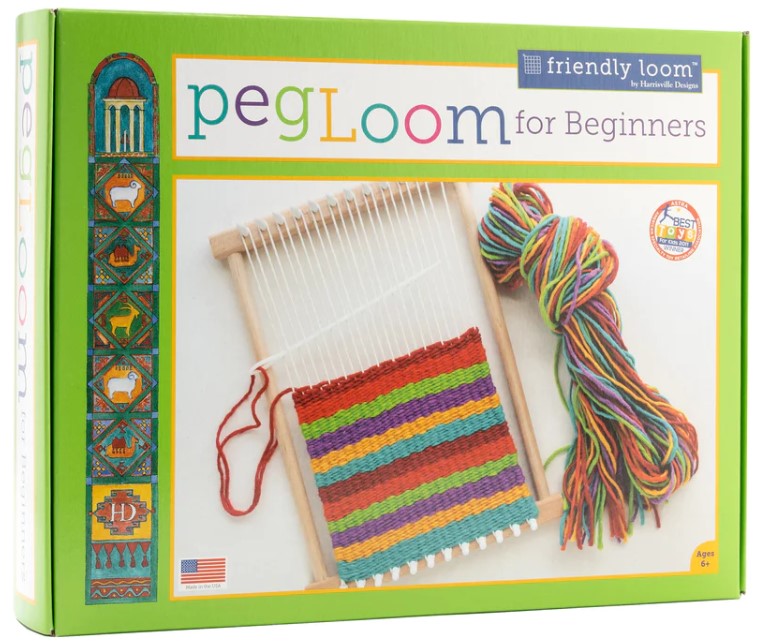
About Peg Loom Weaving Kit
Recommended Age 5+
Learn the basics of loom weaving to create beautiful projects out of yarn, like wall hangings and tapestries!
Your project is yours to keep.
Donations for supplies are gratefully accepted.
Items included in the kit:
- Peg Loom
- 50 g of Yarn (assorted colours)
- Long Plastic needle
- Cotton warp string
- Plastic fork
Borrow a Peg Loom Kit
The Peg Loom Weaving Kit can be requested from the SamePage Catalogue.
Once available it can be borrowed for 3 weeks.
Getting Started
Watch the video below to see how to set up and start weaving. You can also keep reading for written instructions. The Friendly Loom Instructional booklet included with the kit also has helpful instructions with diagrams.
Terminology
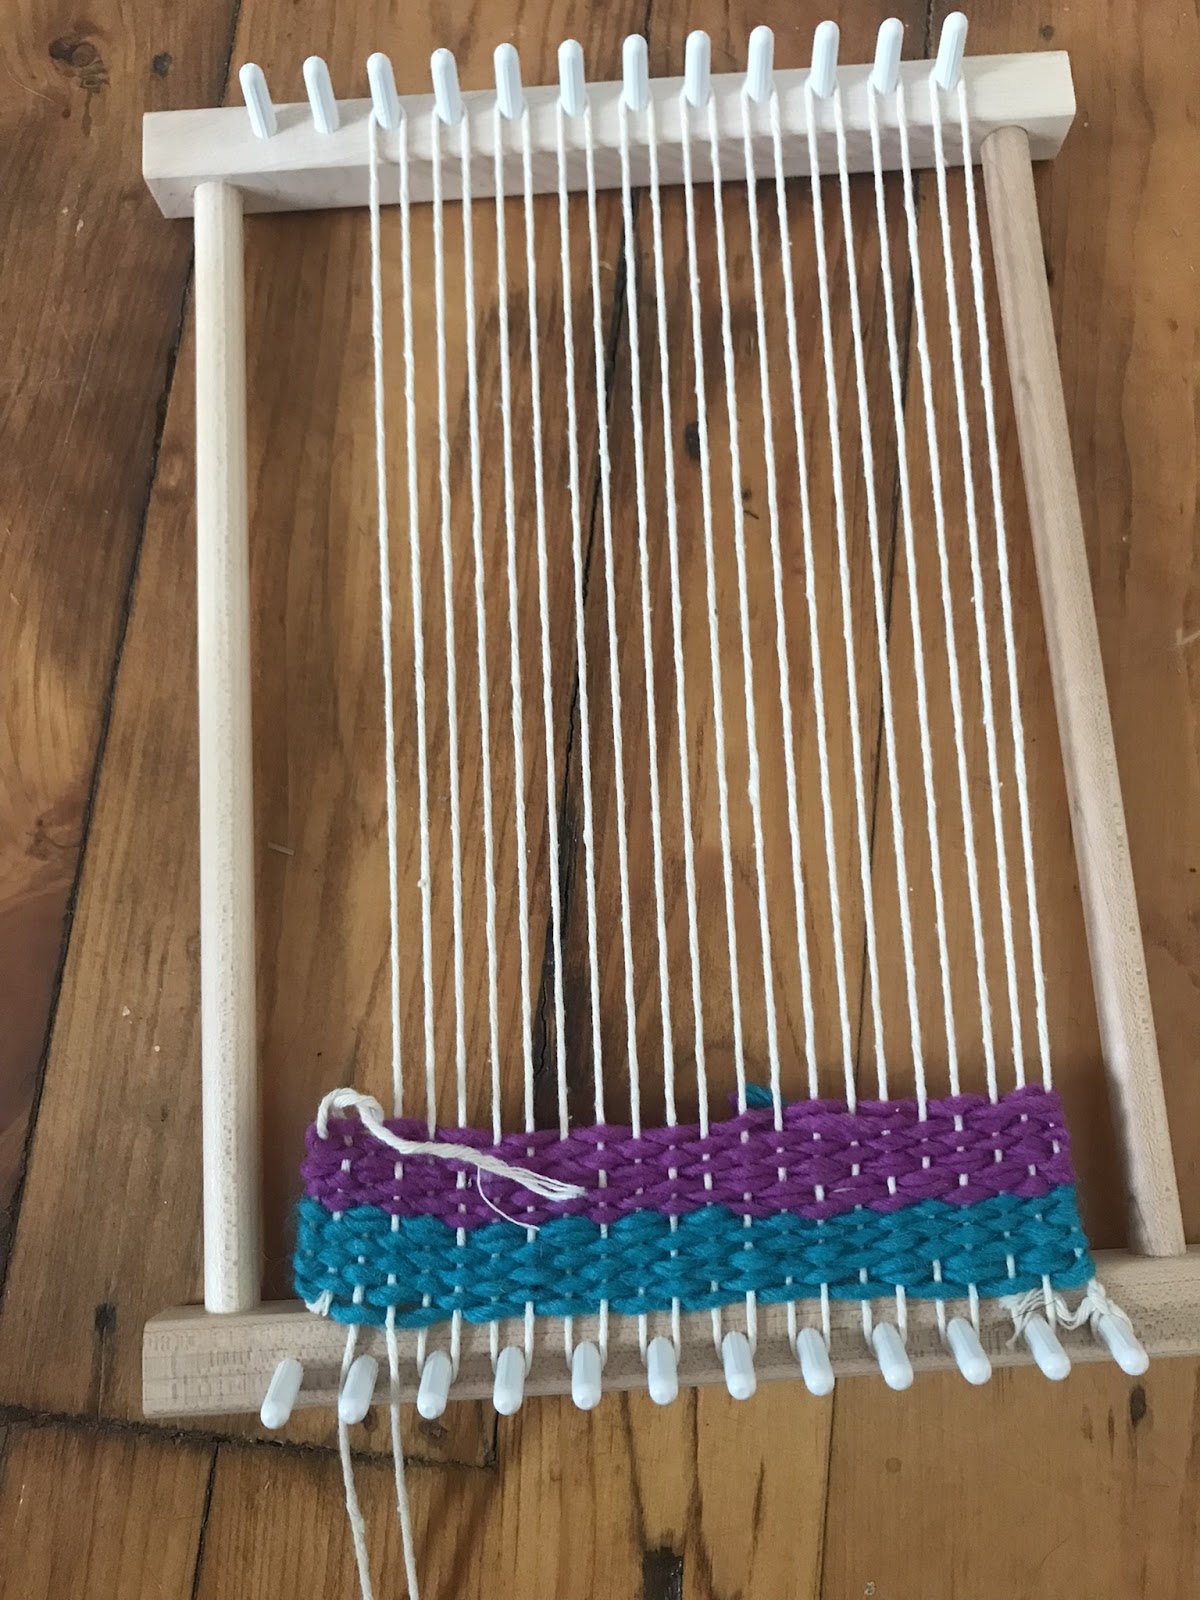
Weaving using two sets of thread or yarn to make cloth.
In weaving, warp refers to the vertical threads that are held stationary on the frame or loom. Weft refers to the threads that are woven in and out of the warp, running horizontally across the loom.
With the Peg Loom you will make a warp by wrapping white cotton thread around the pegs on the loom.
The weft will be the coloured yarns you weave over and under the warp threads.
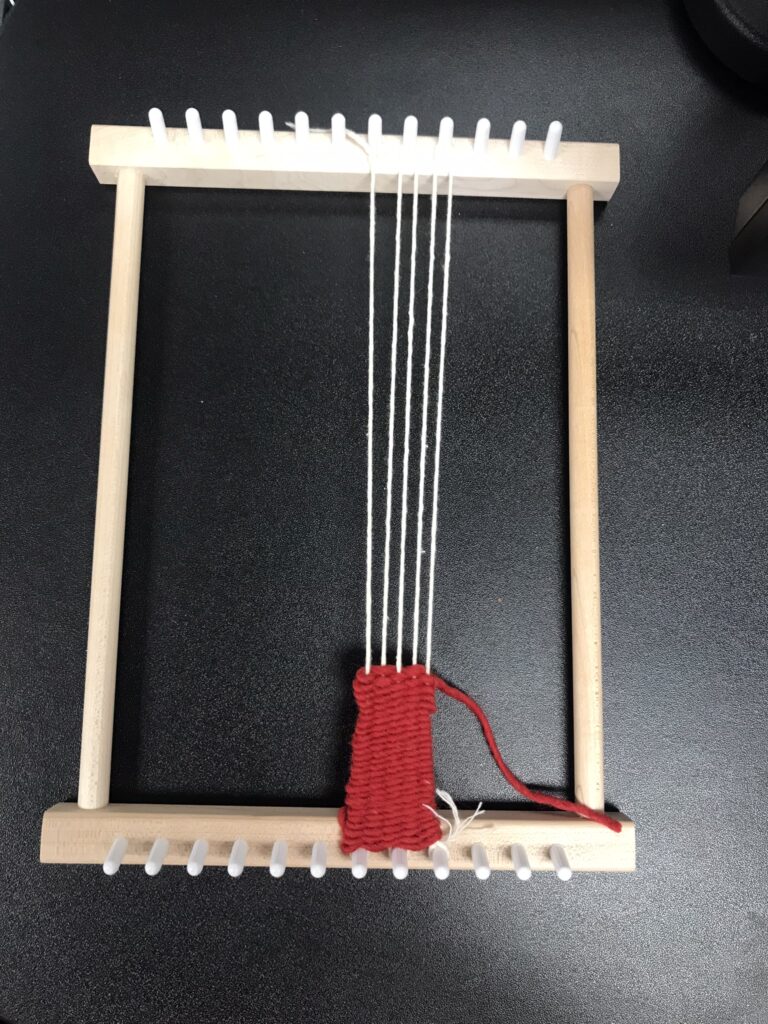
Setting up the Warp
- Using the white cotton warp string, tie one end to any corner peg (top or bottom).
- Begin looping the string around each peg, alternating between the top and bottom row of pegs. Keep the string tight!
- When you reach the last peg (which should be the opposite side of where you started), tie it off and cut the string, leaving two or three inches.
How to Weave
- Thread a piece of yarn through the needle. DO NOT tie the yarn.
- Starting on the right side of the loom, begin weaving the needle through the warp string by going over the first string, under the second, over the third, under the fourth, and so on, until you reach the other end of your loom. Make sure to leave a two to three inch tail hanging at the side you started.
- Tuck in the tail by weaving it through the warp string, similar to the steps in Step 2.
- Using your fingers (or a fork!), tap the yarn down towards the bottom of the loom. Repeat this step after every row. Each row should sit tightly against one another.
- When you reach the last row at the top pegs, weave in the last tail.
- Gently lift your project off the loom.
Refer to the Friendly Loom Instruction Booklet for additional tips and photo references.
Ideas for Small Projects
- Instead of adding warp thread to the whole frame, use only 3 or 4 centre pegs of the loom. This will make a great bookmark or chunky bracelet.
What to do if you don’t finish weaving the whole warp.
It is preferable to fill the whole frame so if you intend to make a smaller project from the start, i.e. a bookmark, only add the warp thread to a few centre pegs, as shown above.
If you intended to fill the whole frame but didn’t have time or decided you wanted a smaller project here is what you can do:
- Weave to your desired size. Gently lift warp thread off one peg at a time and pull through to the next peg.
- Keep a bit of a tail with the warp string.
- Work slowly and patiently until you get back to the beginning of the project.
- Use a needle to weave in the tails of the warp.


Additional Resources & Related Reading
Books
- Kageyama, Harumi. Weaving with little handmade looms : make your own mini looms & weave 25 exquisite projects. Salem, MA, USA : Zakka Workshop, 2019.
- Lots of ideas for small gifts and decor items to make with small and even miniature looms.
- Monaghan, Kathleen. You can weave! : projects for young weavers. Worcester, Mass. : Davis Publications, c2000.
- An excellent book showcasing many child-friendly weaving projects and styles of weaving. From simple frame looms similar to the peg loom, to backstrap weaving, bead looms, and Kumihimo braiding. Includes tips for classroom teachers.
- Sigma, Maria. Weave it! : 15 fun weaving projects for kids.Atglen, PA : Schiffer Publishing, 2020.
- Many projects to make using handmade looms. Scrap fabric is often used for projects which adds more interest to the finished projects and projects are faster than those using yarns.
- Stephens, Cassie. Stitch + string lab for kids : 40+ creative projects to sew, embroider, weave, wrap, and tie. Beverly, MA : Quarry Books, 2019.
- Includes projects for DIY looms out of cardboard, popsicle sticks, paper plates, picture frames, and straws. Also has ideas for simple embroidery, sewing, and finger knitting crafts.
These books and more can be borrowed through the samepage catalogue:
https://samepagecbrl.bibliocommons.com/
FEEDBACK
We’d love to hear from you! Please provide us with your feedback by filling out the feedback form included in your kit, or by filling in our online survey.
STEAM Kits
Frequently Asked Questions
What is STEAM?
STEAM is an acronym for science, technology, engineering, art, and math. It is an approach to learning that uses these subjects as a guide to problem-solving, inquiry, dialogue, and critical thinking.
What are STEAM Kits?
STEAM Kits contain hands-on activities that support STEAM-based
learning.
How do I check out a STEAM Kit?
For how long can I borrow a STEAM Kit?
STEAM Kits can be checked out online through the Cape Breton
Regional Library website (www.cbrl.ca), or in person at any of our
branch locations.
STEAM Kits can be borrowed for up to 3 weeks.
How do I return a STEAM kit?
STEAM Kits can be returned to any of our branch locations. Please
bring the STEAM Kit to the circulation desk. Do not leave in the book return dropbox.
Who do I contact for more information?
If you have any questions or need assistance with your STEAM Kit,
please contact your local branch or email us at info@cbrl.ca.